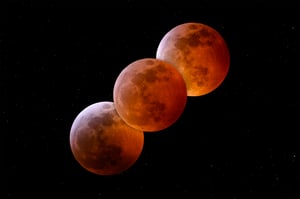
Photographers in North and South America are in for a treat, as there is a total lunar eclipse tonight! It’s visible the evening of March 13th and/or early morning of March 14th, depending on where you live. Here’s a refresher on how to photograph the lunar eclipse and get great shots!
The Chimborazo Hillstar: A High-Altitude Hummingbird
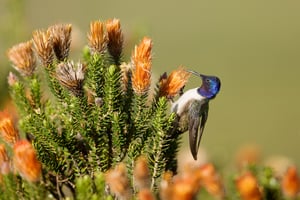
Hummingbirds are commonly thought of as a typical tropical bird family. And for the most part, this perception is accurate - of the 363 species of hummingbirds, the vast majority thrive in tropical environments. But some species inhabit such extreme habitats that few would expect to find tiny, fragile hummingbirds...
Nikon AF Micro-Nikkor 200mm f/4D IF-ED Review
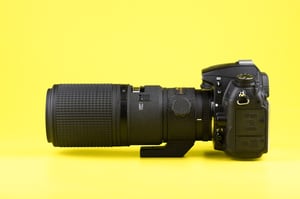
This hands-on review covers everything you need to know about the Nikon AF Micro-Nikkor 200mm f/4D, a telephoto macro lens that has earned a place in Nikon’s hall of fame. This classic lens was first made in 1993 – here’s how it measures up by today’s strict standards!
Photography News: Sigma Rumors, Tripod + Monopod Deals
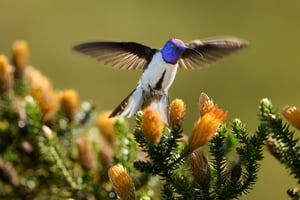
Today, I have two things landing for you - an Ecuadorian Hillstar on a Chuquiraga flower, and another round of photography news. And soon, you may read my first impressions of the new Nikon Z 35mm f/1.2 lens, possibly as early as next week. If luck is on my side, I...
Why You Should Capture Animal Behavior in Wildlife Photography

Wildlife photography is a fascinating and challenging field that requires technical skill, patience, and a deep understanding of wildlife. One of the most significant parts of this art form is to capture the behavior of animals in their natural habitat. By doing so, you can improve your photos and contribute...
Tripods vs Monopods for Wildlife Photography

When you read the title of this article, you might have said to yourself "neither" - and I wouldn't blame you! After all, who wants to carry extra weight in the field? Modern image stabilization systems allow us to handhold the camera at shutter speeds that were once unthinkable. But...
How to Beat Imposter Syndrome as a Photographer
Imposter syndrome is a common psychological phenomenon that causes people to doubt their abilities and feel fake, despite their successes and skills. It can profoundly impact a photographer’s journey and progress. Today, I’ll explore practical strategies to deal with impostor syndrome and improve your confidence as a photographer.
Photography News: Third-Party Lenses, DxO PureRAW 5
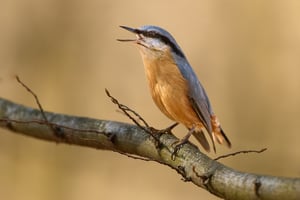
I don't know about you, but here outside my window at the 50th parallel north, spring has arrived in full force. At least, that's what the Nuthatch outside my window has been persistently announcing since early morning. If you've been in a deep winter's photographic slumber, it's time to charge...
PL Garage Sale (Prices Reduced by 20%)

Winter is a great time to go through all the gear and decide what stays and what needs to go. Our team at Photography Life decided to run a garage sale of all the items that should go to trusty hands at great prices! Below is a list of all...
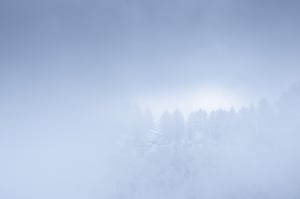
The Subtle Art of Blocking in Landscape Photography
A fundamental idea in composition is that you should exclude anything from your photo that doesn’t add to your message. An errant branch, footprints on the ground, whatever harms your story – leave them out of the composition, and you’ll get a stronger photo. But… what if you can’t exclude them completely?