In August of 2022, the Chinese lens company Viltrox quietly removed a lens from their online store: the Canon RF version of the Viltrox AF 85mm f/1.8. Soon, it became clear that this removal was in response to a demand from Canon that the lens no longer be sold.
Photography News: Sony 16-25mm f/2.8 Announced, Fuji Medium Format Sale
Have you ever wondered what the subject you are photographing would look like if you had a different camera? Namely, a camera with a smaller or larger sensor than the one you currently have? I have asked myself this question before, and will soon offer my answer in an article....
Portraying Misunderstood Animals Through Photography

As photographers, we have a unique ability to impact how people perceive on our subjects. Some of the most magnificent animals on the planet are also some of the most feared, but it doesn't have to be this way. With my photography, I try to tell a story about my...
Nikon Z 28-400mm f/4-8 VR: First Impressions

Superzooms have always been viewed with a certain amount of disdain by "serious" photographers. Fairly or unfairly, lots of photographers would immediately dismiss anything more extreme than a 24-120mm lens. But now, Nikon has released not a superzoom, but a straight hyperzoom, whose wide end starts at 28mm and ends...
Nikon Z 400mm f/2.8 TC VR S Review
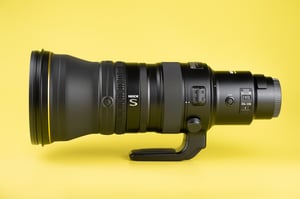
We’ve just finished a major update to our review of the Nikon Z 400mm f/2.8 TC VR S, with lab tests of sharpness and extensive comparisons against other Nikon lenses that you may be considering. How does this lens perform? Perhaps predictably, it’s incredible!
Photography Life Annual Membership + 72 Hour Sale Announced!

I’m excited to announce that we’re now able to offer yearly, rather than just monthly, memberships on our Member Page! Our readers have asked about this feature for months, and it’s finally here. To kick things off, we’re also announcing a major 72-hour sale for yearly signups.
Photography News: Nikon Camera Sales, Panasonic S5 II Pre-Burst

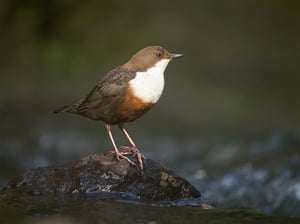
This has been quite a busy week for our team. Spencer put another batch of lenses through their paces in our lab, including a pair of Nikon supertelephotos that I'm very curious about. Jason is on a quest to photograph his 700th bird species, currently stuck on bird #699. As...
One Way to Take Better Light Painting Photos at Night
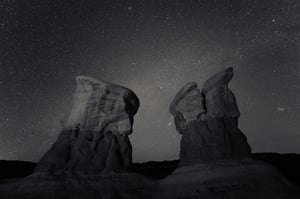
If you’ve ever tried light painting for Milky Way photography, you may have run into some frustrating issues. Maybe your light’s color temperature didn’t match the scene, or the shadows and highlights somehow looked artificial. Or, perhaps you got a spotlight effect that didn’t cover a wide enough area.
Peak Design Travel Backpack 45L Review
Recently, I was asked what piece of photography equipment I use the most. At first, I almost said "my camera". But then I thought about it and reconsidered my answer. While it is true that I use my camera for 100% of my photographic work, there is another piece of...
1,000 Photography Life Members – Thank You!

Three months ago, we decided to take Photography Life in a different direction. At a time when most websites shove increasingly aggressive ads into people’s faces, and many replace good writers with AI-generated garbage, we removed all third-party ads from Photography Life and invested even more in our articles.