
A few months ago on Photography Life, I wrote about my experiences photographing a sheet of crystalline ice structures on the frozen surface of a pond. Not long after writing that article, a rare sunny day with a bright blue sky sent me out to the pond again.
Nikon Z DX 18-140mm f/3.5-6.3 VR Review

This hands-on review covers everything you need to know about the Nikon Z DX 18-140mm f/3.5-6.3 VR, a versatile superzoom for Nikon DX mirrorless cameras. With full-frame equivalent focal lengths of 27-210mm, this lens allows wide-angle photos at 18mm, telephoto pictures at 140mm, and anything in between.
How to Back Up Photos to a Hard Drive with Your Phone

The tempting idea of traveling lightweight is rarely easy as a photographer. It doesn't take much - just an extra lens here, a sturdier tripod there - and your bag suddenly weighs as much as a bull elephant. While I can't totally cure your PEES (Packing Excessive Equipment Syndrome), my...
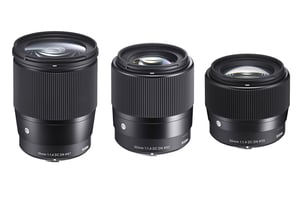
Sigma and Tamron Lenses Coming to Canon RF Mount
In August of 2022, the Chinese lens company Viltrox quietly removed a lens from their online store: the Canon RF version of the Viltrox AF 85mm f/1.8. Soon, it became clear that this removal was in response to a demand from Canon that the lens no longer be sold.
Photography News: Sony 16-25mm f/2.8 Announced, Fuji Medium Format Sale

Have you ever wondered what the subject you are photographing would look like if you had a different camera? Namely, a camera with a smaller or larger sensor than the one you currently have? I have asked myself this question before, and will soon offer my answer in an article....
Portraying Misunderstood Animals Through Photography

As photographers, we have a unique ability to impact how people perceive on our subjects. Some of the most magnificent animals on the planet are also some of the most feared, but it doesn't have to be this way. With my photography, I try to tell a story about my...
Nikon Z 28-400mm f/4-8 VR: First Impressions

Superzooms have always been viewed with a certain amount of disdain by "serious" photographers. Fairly or unfairly, lots of photographers would immediately dismiss anything more extreme than a 24-120mm lens. But now, Nikon has released not a superzoom, but a straight hyperzoom, whose wide end starts at 28mm and ends...
Nikon Z 400mm f/2.8 TC VR S Review
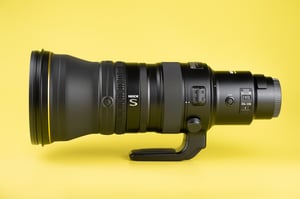
We’ve just finished a major update to our review of the Nikon Z 400mm f/2.8 TC VR S, with lab tests of sharpness and extensive comparisons against other Nikon lenses that you may be considering. How does this lens perform? Perhaps predictably, it’s incredible!
Photography Life Annual Membership + 72 Hour Sale Announced!

I’m excited to announce that we’re now able to offer yearly, rather than just monthly, memberships on our Member Page! Our readers have asked about this feature for months, and it’s finally here. To kick things off, we’re also announcing a major 72-hour sale for yearly signups.
Photography News: Nikon Camera Sales, Panasonic S5 II Pre-Burst

This has been quite a busy week for our team. Spencer put another batch of lenses through their paces in our lab, including a pair of Nikon supertelephotos that I'm very curious about. Jason is on a quest to photograph his 700th bird species, currently stuck on bird #699. As...